UI Module
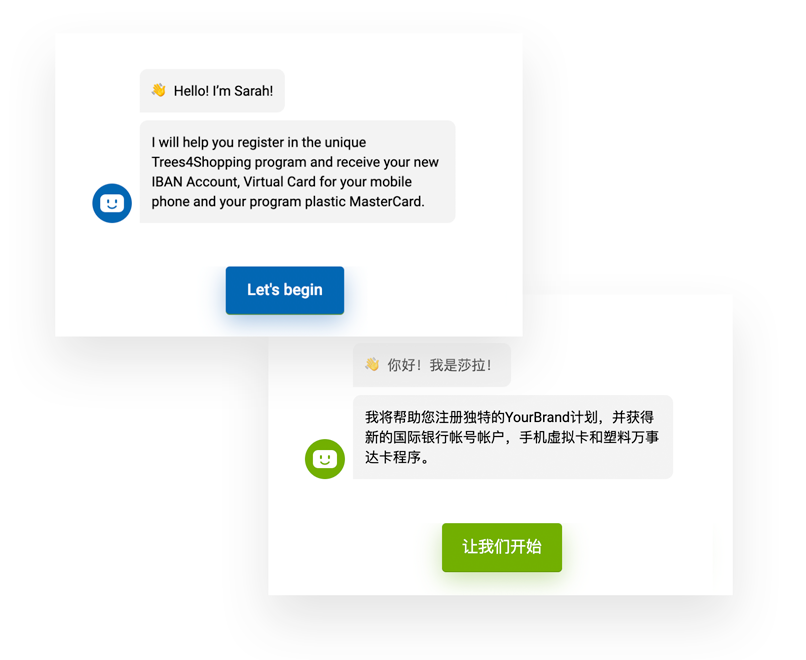
Customisable UI module will help you to integrate our solutions into your business in hours.
Project Structure
First of all, let's get familiar with the project structure.
-
srcsome description about the folder
- app main working directory
- assets
- fonts put your fonts here
- i18n put your translations here
- images put your images here
- style
- fonts.scss import fonts
- variables.scss customize schema
- environments if you have multiple environments specify
config file for each environment
- config.ts dynamic content config
- environment.dev.ts
- environment.stage.ts
- environment.prod.ts
Style Configuration
First of all, let's get familiar with the project structure.
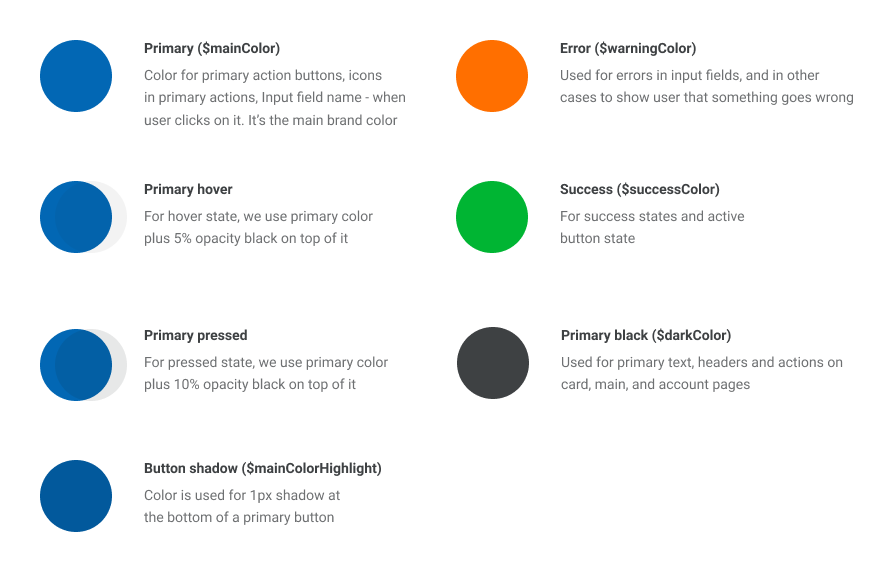
To customize appearance open src/assets/style/variables.scss file and change the
variables inside. The diagram below
describes a colour schema and usage of different colours. We minimized the set of colours in the
schema just to 5 colours. You can also find font constants in the file and change it. Make sure you
imported your fonts in src/assets/style/fonts.scss file.
Configuration file example
$mainColor: rgba(114, 175, 0, 1);
$mainColor40: rgba(114, 175, 0, 0.4);
$mainColor10: rgba(114, 175, 0, 0.1);
$mainColor15: rgba(114, 175, 0, 0.15);
$mainColor20: rgba(114, 175, 0, 0.2);
$mainColorHighlight: rgba(96, 147, 0, 1);

$darkColor: rgba(14, 17, 20, 1);
$darkColor80: rgba(14, 17, 20, 0.8);
$darkColor50: rgba(14, 17, 20, 0.5);
$darkColor40: rgba(14, 17, 20, 0.4);
$darkColor24: rgba(14, 17, 20, 0.24);
$darkColor10: rgba(14, 17, 20, 0.1);
$darkColor05: rgba(14, 17, 20, 0.05);

$darkSecondaryColor50: rgba(95, 100, 105, 0.5);

$lightColor: rgb(242, 244, 245);

$warningColor: rgb(255, 111, 0);
$successColor: rgb(114, 175, 0);

$primaryFont: 'Roboto', sans-serif;
$secondaryFont: 'Gilroy', sans-serif;
Installation
All Omniwire source codes are accessible by Client TOKEN. You should receive it from Omniwire Sales Team. Just replace TOKEN in the lines below to clone the repository
You can clone repository
git clone TOKEN:x-oauth-basic@github.com/Optherium/optherium-kyc-moduleInstall dependencies
npm iRun local server
npm run start
Integration
For our modules we utilize Angular elements approach. Angular elements are Angular components packaged as custom elements (also called Web Components), a web standard for defining new HTML elements in a framework-agnostic way. Read More
To build module as angular element run. Result of this command you can find in the dist
folder.
npm run el-build
Copy resulting build to your project's static folder and load it to your index.html
var script = document.createElement('script');
var element;
script.src = `{PATH}/optherium-kyc.js`;
script.id = 'kyc-script';
script.onload = function () {
    element = document.createElement(`optherium-kyc`);
    element.id = 'kyc-element';
    container.appendChild(element);
    resolve(element);
    script.removeEventListener('onload', function () {
        console.warn(`${module.toUpperCase()} onload listener removed`);
        });
    };
document.head.appendChild(script);
Subscribe on complete event to know when user has completed KYC/login scenario and
redirect him to your app.
element.addEventListener('complete', async () => {
    // do something
})
A JWT token is a structure consisting of data, additional information, such as time of obsolescence and digital signature on data and meta-information.
A token is created by the server and signed with a private key.
During the registration process, a token is created with the IdentityId signed by the private key of the Omniwire
servers
Toke is hosted at localstorage OPTM-CORE-JWT_ XXX
Where XXX is the session identifier.
Since only one active session is currently supported, it is permissible to get the first key found starting with OPTM-CORE-JWT_.
This token can be used to authorize the client in the service. The following diagram illustrates a mechanism of exchange of token between User Application, Application Server, and KYC & Identity Management Network.
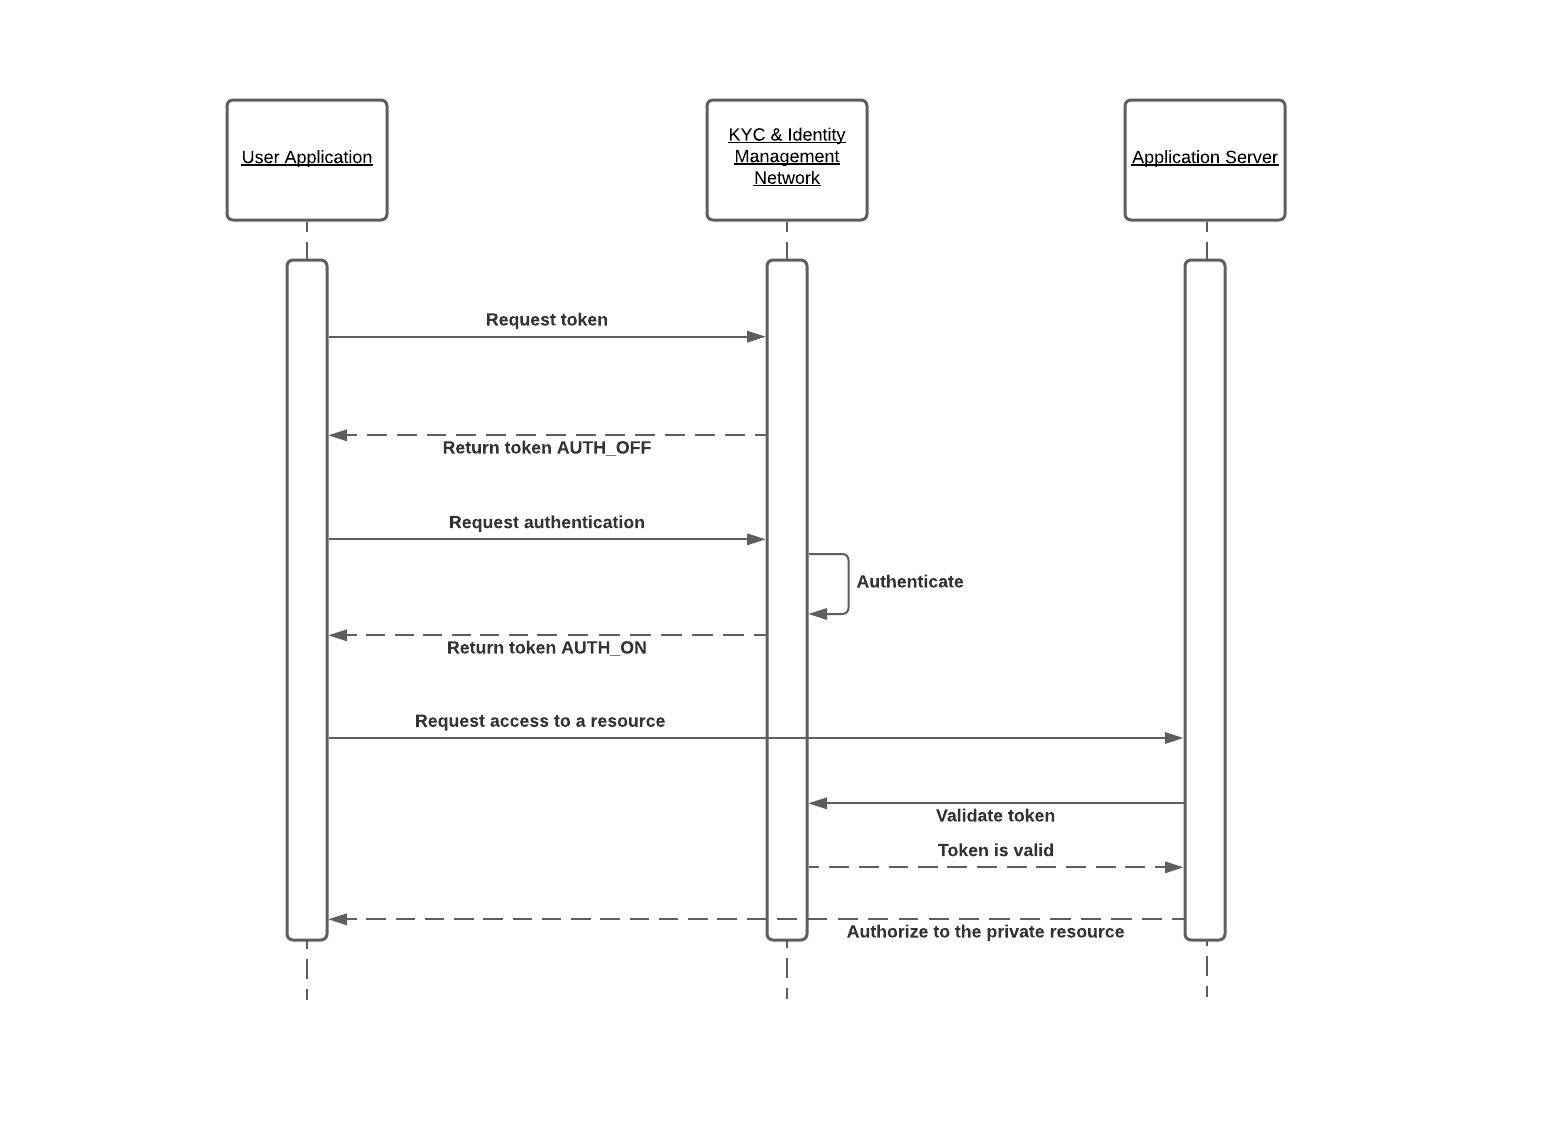
On the Application server side, a token can be validated by sending a HTTPS request to the service issued a token (Validate token step on the diagram above).
const elliptic = require('elliptic')
const { KEYUTIL } = require('jsrsasign');
const request = require('request')

const EC = elliptic.ec;
const ecdsaCurve = elliptic.curves['p256'];
const ecdsa = new EC(ecdsaCurve);

// Paste secret here
const apiSecret = ``

const apiPath = 'https://example.url/validate'// Example path

const nonce = (Date.now() * 1000).toString() // Standard nonce generator. Timestamp * 1000
const body = {
    token:'eyJhbGciOiJSUzI1NiIsIng1dCI6IjdkRC1nZWNOZ'
} // Field you may change depending on endpoint

let signatureMessage = `${apiPath}${nonce}${JSON.stringify(body)}`
// Consists of the complete url, nonce, and request body

// The signatureMessage is signed using private key
const privateKey = KEYUTIL.getKeyFromPlainPrivatePKCS8PEM(apiSecret)
const keyObj = KEYUTIL.getKey(privateKey);
const signKey = ecdsa.keyFromPrivate(keyObj.prvKeyHex, 'hex');
const signature = signKey.sign(Buffer.from(JSON.stringify(signatureMessage)).toString('hex')).toDER('hex');


const options = {
    url: apiPath,
    headers: {
        'opt-nonce': nonce,
        'opt-signature': signature
    },
    body: body,
    json: true
}

request.post(options, (error, response, body) => {
    console.log(body); // Logs the response body
})
Example of JWT decoded payload.
{
identityId: "449fcbee-6753-4b3c-bb1c-fef7cc2c0c9c", // Client id in the system
enrollmentId: "Client-26730130-039a-4b3d-aec1-fb645ea77788",// Device Id

state: "AUTH_ON", // AUTH_ON or AUTH_OFF. This field indicates whether a user has an active session of not

riskScore: "MEDIUM", // Consolidated risk score based on a source of a document and AML&sanctions findings
status: "ACTIVE", // ACTIVE or BLOCKED

// The following statuses describe KYC stages and their completeness
addressStatus: "SUCCESS",
amlStatus: "SUCCESS",
documentStatus: "SUCCESS",
emailStatus: "SUCCESS",
phoneStatus: "SUCCESS",
deliveryStatus: "SUCCESS",
dueDiligenceStatus: "SUCCESS",

// The following structure describes a user's device and an application he/she came from.
device: {
  deviceType: "web",
  device: "Chrome (OS X 10.15.5)",
  browser: {
   name: "Chrome",
   version: "84.0.4147"
  },
  os: "OS X 10.15.5",
  app: "banking",
  deviceName: "Chrome (OS X 10.15.5)",
  deviceDetailedType: "macLaptop",
  appGroup: "generic",
  appName: "YourBrand App",
  userAgent: "Mozilla/5.0 (Macintosh; Intel Mac OS X 10_15_5) AppleWebKit/537.36 (KHTML, like Gecko) Chrome/84.0.4147.135 Safari/537.36",
  platform: "MacIntel",
  resolution: {
   width: 1680,
   height: 1050
  }
 },

//Administrative claims user has
claims: "getRecoveryRequest,processRecoveryRequest,getIdentity,readEmail,readPhone,readBioInfo,readDocument,readAddress,readAmlResult,editDescription,blockUnblock,getStatistics,createRoles,assignRoles,readVerificationInfo,processAML,performUserAMLCheck,searchAMLInfo,performPersonAMLCheck,verifyPersonAMLCheck,verifyUserAMLCheck,getDueDiligenceInfo,uploadImportJob,searchDeliveryAddressInfo,getDeliveryAddressInfo,readUserDocument,readAuthRequest,searchIdentity,editDevice,editAdminRequest,readAdminRequest,readDocumentProof,assignProcessingIdentity,searchAddressInfo,processAddress,deletePersonalData,searchRole",

iat: 1583321415, // Token issued at
exp: 1583322315, // Token expiration date
}